$$\rightleftharpoonup{xx}$$
$$\longleftharp{xx}$$,
$$\longrightharp{xx}$$,
This retrospective cohort study was approved by the Ethics Committee of Kitano Hospital (258005, August 19, 2025) and was conducted in accordance with the Declaration of Helsinki. Informed consent was obtained through opt-out forms on our website (https://kitano.bvits.com/rinri/publish.aspx).
1. Prepare the multiring thread
- Prepare a 2.5 mL plastic disposable syringe with an outer diameter of 10–12 mm.
- Cut approximately 40 cm of 4-0 nylon thread. Adjust the length based on the number of rings required and lesion characteristics.
- Tie three tight overhand knots around the syringe to form the first ring (Figure 1).
CAUTION: Avoid excessive tension when tying the nylon thread to prevent breakage or deformation of the ring structure.
- Rotate the first ring by 180° along its longitudinal axis (Figure 2).
- Repeat the knotting method described in Step 1.3 to form an additional ring connected to the first ring (Figure 3).
- Form three rings for typical gastric lesions. Increase the number of rings for larger lesions or when a longer traction distance is required (Figure 4).
NOTE: The number of rings and the thread length depend on lesion location and procedural requirements. Three rings are generally sufficient to grasp the mucosal flap and the opposing mucosa and maintain stable traction.
- Prepare additional multiring threads in advance when needed. Store prepared threads in a sterile container at room temperature. Use within an appropriate time frame based on institutional practice (e.g., up to approximately 30 days). Cut the loops to the desired length and number immediately before or during the procedure.
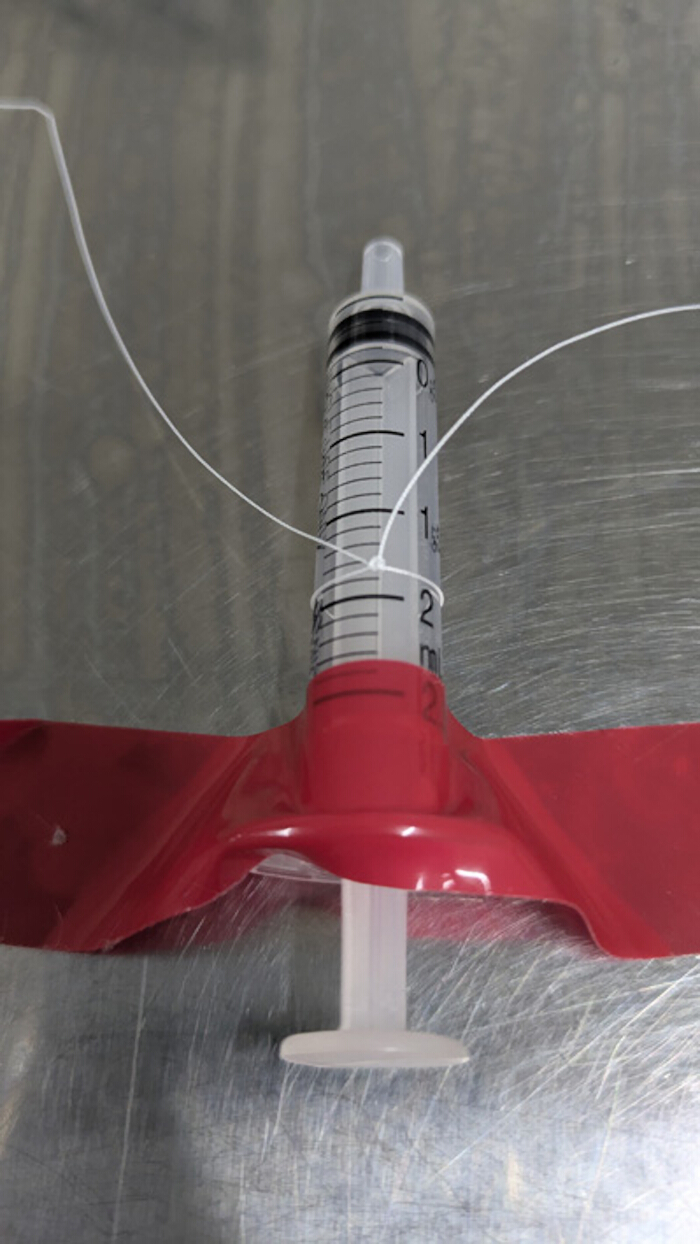
Figure 1. Formation of the first ring of the multiring thread. The 4-0 nylon thread is tied around a 2.5 mL syringe three times to form the initial ring used for traction. Please click here to view a larger version of this figure.
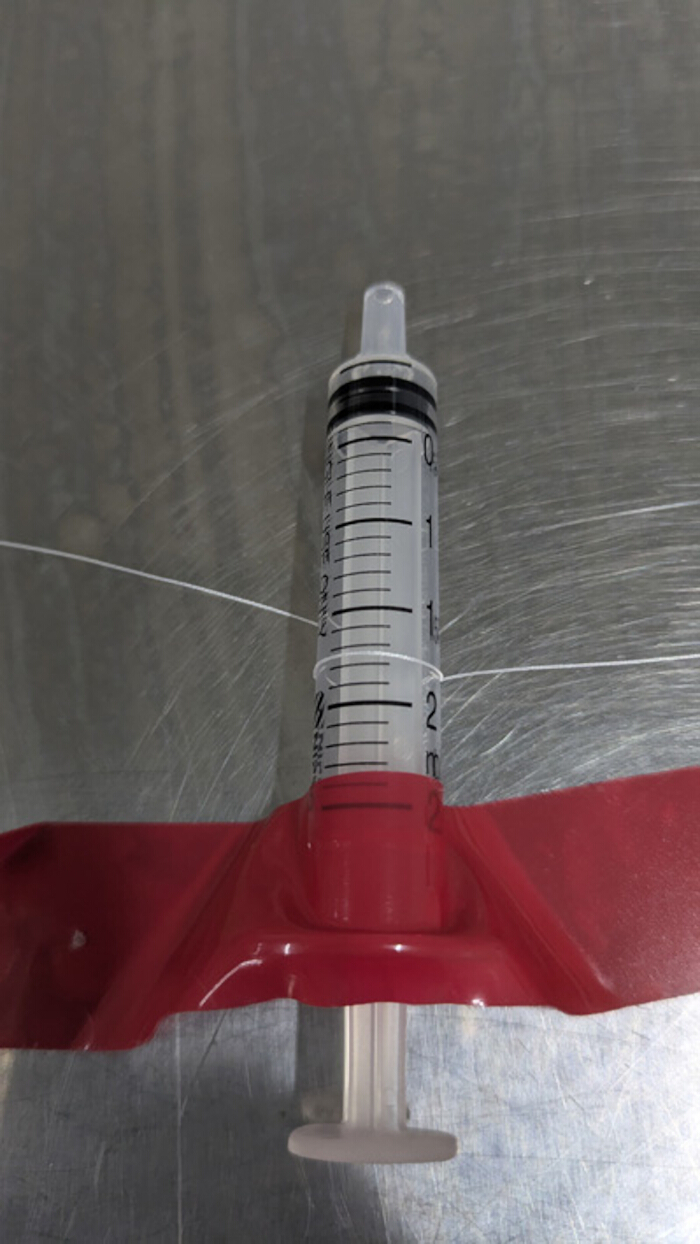
Figure 2. Rotation of the first ring. The first ring is rotated 180° after formation to enable proper alignment of subsequent rings. Please click here to view a larger version of this figure.
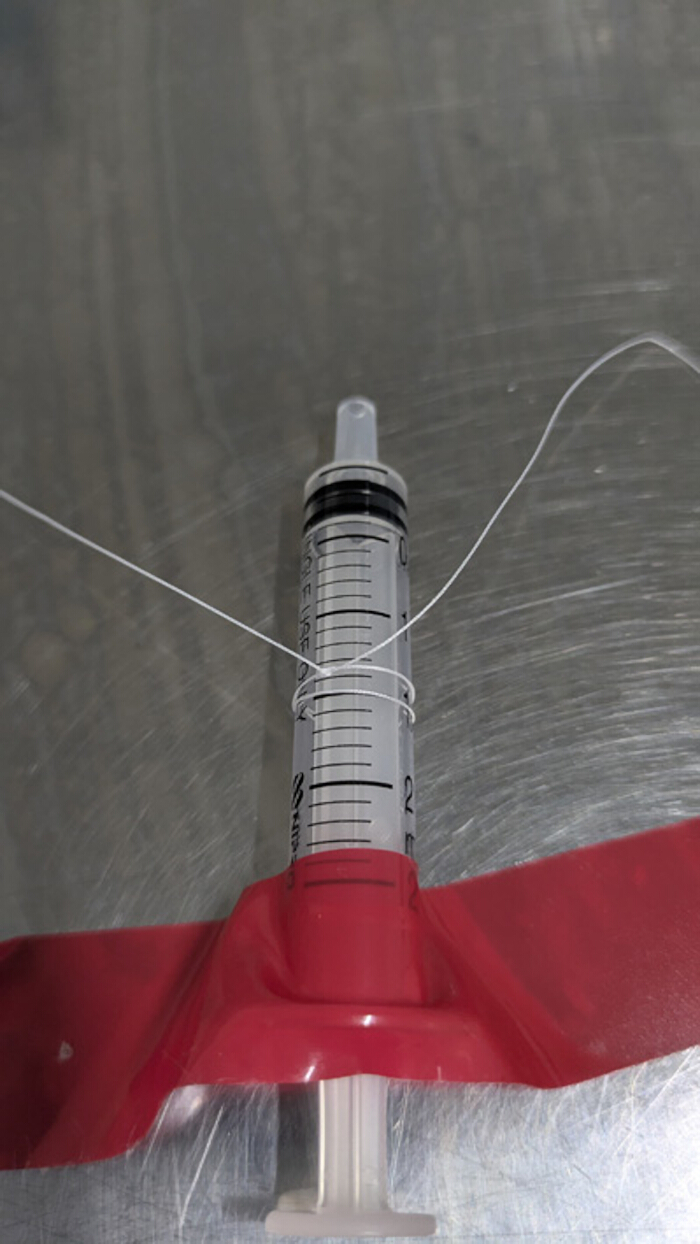
Figure 3. Formation of an additional ring. The nylon thread is tied again around the syringe to create a second ring connected to the first ring. Please click here to view a larger version of this figure.
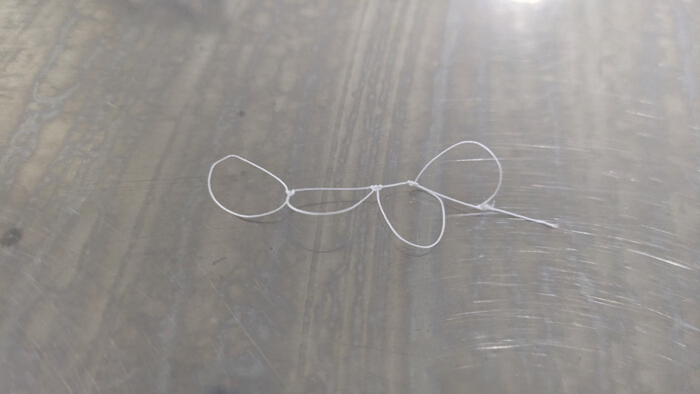
Figure 4. Completed multiring thread structure. Three connected rings are formed in series to create the multiring thread used for internal traction. Please click here to view a larger version of this figure.
2. Gastric ESD procedure
- Perform the procedure under conscious sedation or general anesthesia according to institutional protocols using a standard therapeutic endoscope with a working channel of ≥2.8 mm. Continuously monitor vital signs, including heart rate, blood pressure, oxygen saturation, and respiratory status, throughout the procedure. Ensure that appropriate resuscitation equipment and trained personnel are available.
- Perform circumferential marking using an ESD knife. Place markings approximately 3 mm from the lesion border. Increase the marking distance to 5–10 mm for lesions suspected of lateral spread.
- Perform a circumferential mucosal incision and dissect to the deep submucosal layer while injecting a submucosal fluid cushion. Continue dissection until the deep submucosal layer is clearly exposed, as indicated by visualization of the white muscular layer and blue-stained submucosal fibers.
NOTE: After applying the traction device, visualization and access to the rear side of the lesion may be limited. Ensure adequate submucosal trimming before device deployment.
- Form a mucosal flap by dissecting the front side of the submucosa. Create a flap large enough to securely accommodate clip attachment (Figure 5).
- Place two or three marking points on the mucosa to indicate the intended traction site when traction direction is difficult to determine (Figure 6).
NOTE: The ideal traction point is typically located opposite and anterior to the mucosal flap.
- Inject 2–3 mL (or as needed to achieve adequate lifting) of a submucosal lifting solution (e.g., saline, glycerol solution, or hyaluronic acid) beneath the mucosal flap immediately before applying the traction device.
NOTE: Adequate lifting facilitates clip attachment and reduces the risk of grasping the muscular layer.
CAUTION: Avoid excessive injection to prevent overdistension or mucosal tearing.
- Use a reopenable endoscopic clip compatible with the working channel (≥2.8 mm) and capable of repeated opening and closing. Then grasp the end ring of the multiring thread prepared in Step 1.
- Advance the clip holding the multiring thread through the endoscope working channel (Figure 7).
CAUTION: Advance the clip carefully through the endoscope channel to avoid damage to the device or channel.
- Attach the clip to the mucosal flap (Figure 8).
CAUTION: Avoid grasping the muscular layer to prevent perforation.
NOTE: If the muscular layer is inadvertently grasped, use grasping forceps to gently disengage and reposition the clip.
- Advance a second reopenable clip through the endoscope working channel.
- Grasp the ring opposite the attached end of the multiring thread using the second clip.
- Attach the second clip to the normal mucosa opposite the lesion at a position that provides optimal exposure of the submucosal layer (Figure 9).
NOTE: Use previously placed markings as guidance. Adjust the traction direction based on lesion location to optimize visualization of the submucosal layer.
- Continue submucosal dissection while maintaining traction. Approach from the front side and dissect the exposed submucosal layer (Figure 10).
NOTE: If the submucosal layer becomes obscured or the mucosal flap collapses, apply an additional clip to the normal mucosa closer to the mucosal flap.
CAUTION: Avoid excessive traction force to prevent tissue tearing or clip dislodgement.
- Continue dissection until the lesion is fully separated from the surrounding tissue.
NOTE: Confirm complete resection by ensuring no residual lesion remains at the margins.
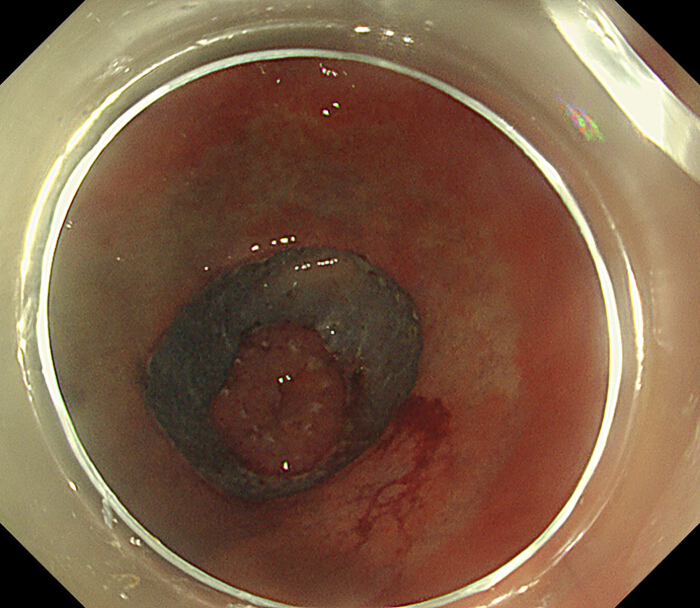
Figure 5. Folded mucosal flap before traction. The mucosal flap remains folded, limiting visualization and access to the submucosal layer. Please click here to view a larger version of this figure.
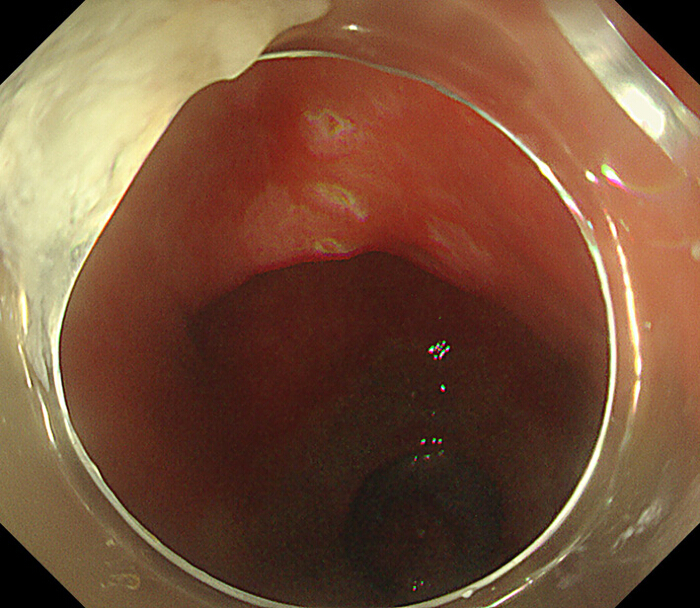
Figure 6. Identification of the traction point. Marking points are placed on the mucosa to determine the optimal location for traction. Please click here to view a larger version of this figure.
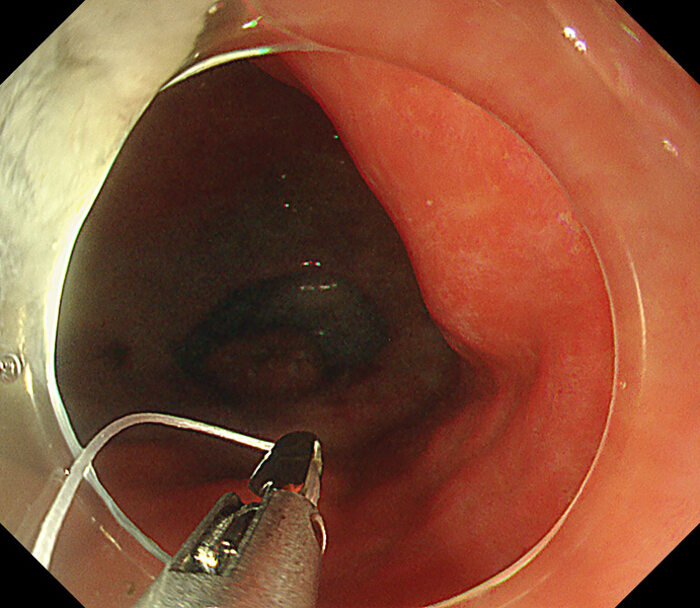
Figure 7. Delivery of the multiring thread. A reopenable clip grasps the end ring of the multiring thread and is advanced through the endoscope channel. Please click here to view a larger version of this figure.
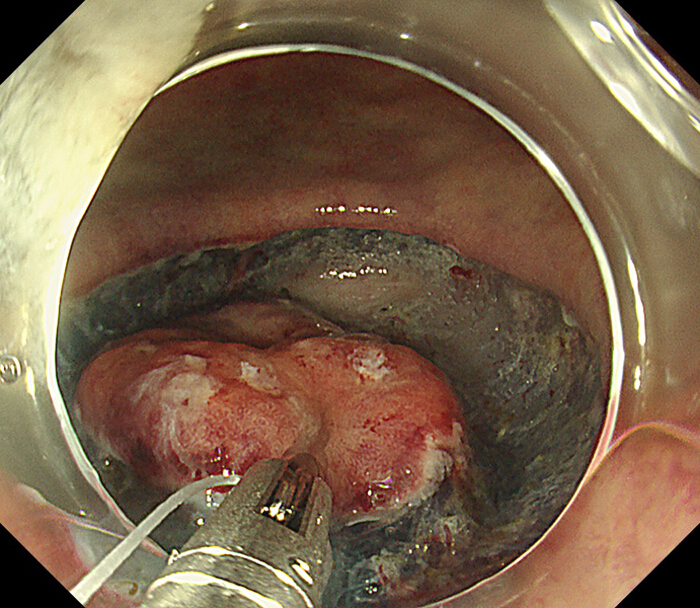
Figure 8. Attachment of the traction device to the mucosal flap. The clip holding the multiring thread is applied to the mucosal flap to initiate traction. Please click here to view a larger version of this figure.
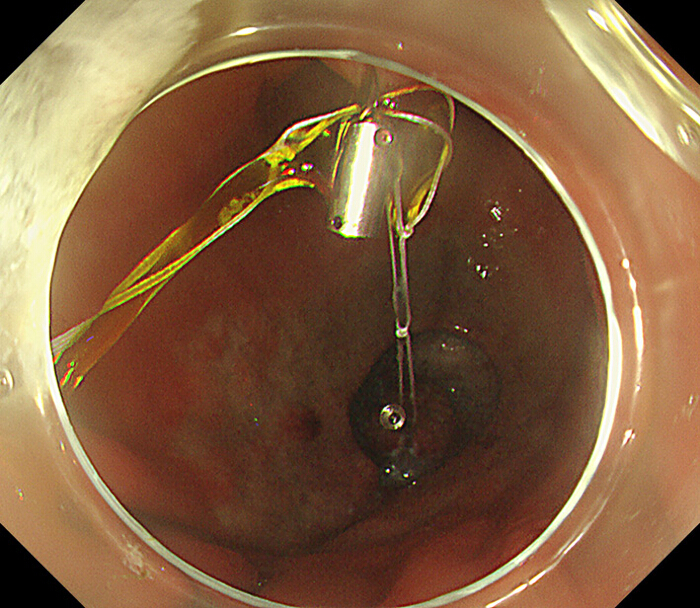
Figure 9. Fixation of the traction device to the opposing mucosa. A second clip secures the free end of the multiring thread to the target mucosal site, establishing traction. Please click here to view a larger version of this figure.
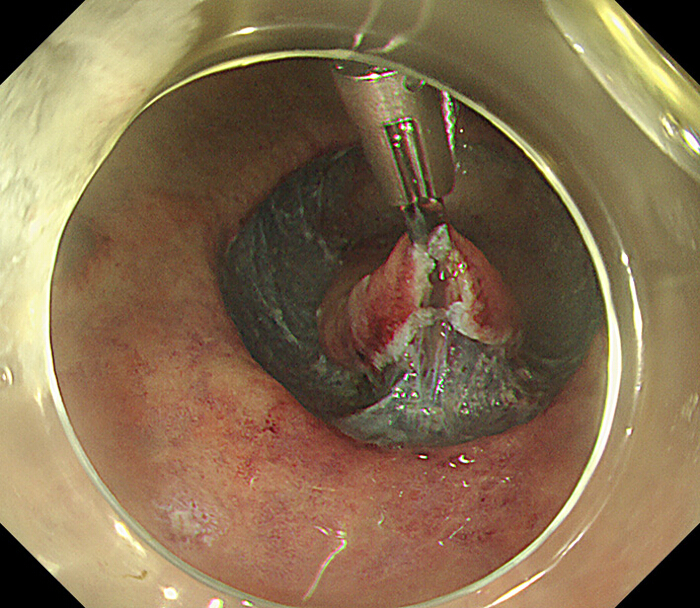
Figure 10. Expanded mucosal flap after traction. Application of the traction device extends the mucosal flap, improving visualization and facilitating submucosal dissection. Please click here to view a larger version of this figure.
3. Post-complete resection
- Advance grasping forceps through the endoscope working channel and remove the second clip from the mucosa.
CAUTION: Remove the clip carefully to avoid mucosal injury or dislodging the resected specimen.
- Retrieve the resected lesion together with the traction device.